
DIY Boho Outdoor Photo Backdrop

In the middle of our backyard, we have this little mulch island that I’ve been wanting to add some landscape design to. I came up with the idea to install a climbing plant wall, and as luck would have it, the climbing plant wall made the perfect backdrop for photos during my daughter’s graduation party! I actually struggled with whether to call this post “DIY Climbing Plant Wall” or “DIY Boho Outdoor Photo Backdrop,” and the latter won since I haven’t actually added the climbing plants yet, haha. Keep reading for all the details you need to make your own, whether it is a climbing plant wall, a boho photo backdrop, or both!


STEP 1: Get Materials
After I shared my vision with Kerry, the handy hubs and I went to Home Depot to pick up materials. In my original concept, all the slats on the wall would be the same width, but Kerry started to conceptualize the wall with slats of varying widths. He laid it out for me on the floor in the middle of Home Depot, and I fell in love! You can see all the materials we purchased in the receipt above, but here’s a shopping list (and product links) for you:
2 in. x 6 in. x 8 ft. #2 Prime Cedar-Tone Pine Pressure-Treated Lumber, Quantity: 2
4 in. x 6 in. x 12 ft. #2 Ground Contact Cedar-Tone Pressure-Treated Timber, Quantity: 2
1 in. x 6 in. x 8 ft. Square Edge Spruce Common Board, Quantity: 8
1 in. x 4 in. x 8 ft. Premium Kiln-Dried Square Edge Whitewood Common Board, Quantity: 6
1 in. x 2 in. x 8 ft. Premium Kiln-Dried Square Edge Whitewood Common Board, Quantity: 11
50 lb. Fast-Setting Concrete Mix by Quikrete, Quantity: 2


STEP 2: Install Support Posts
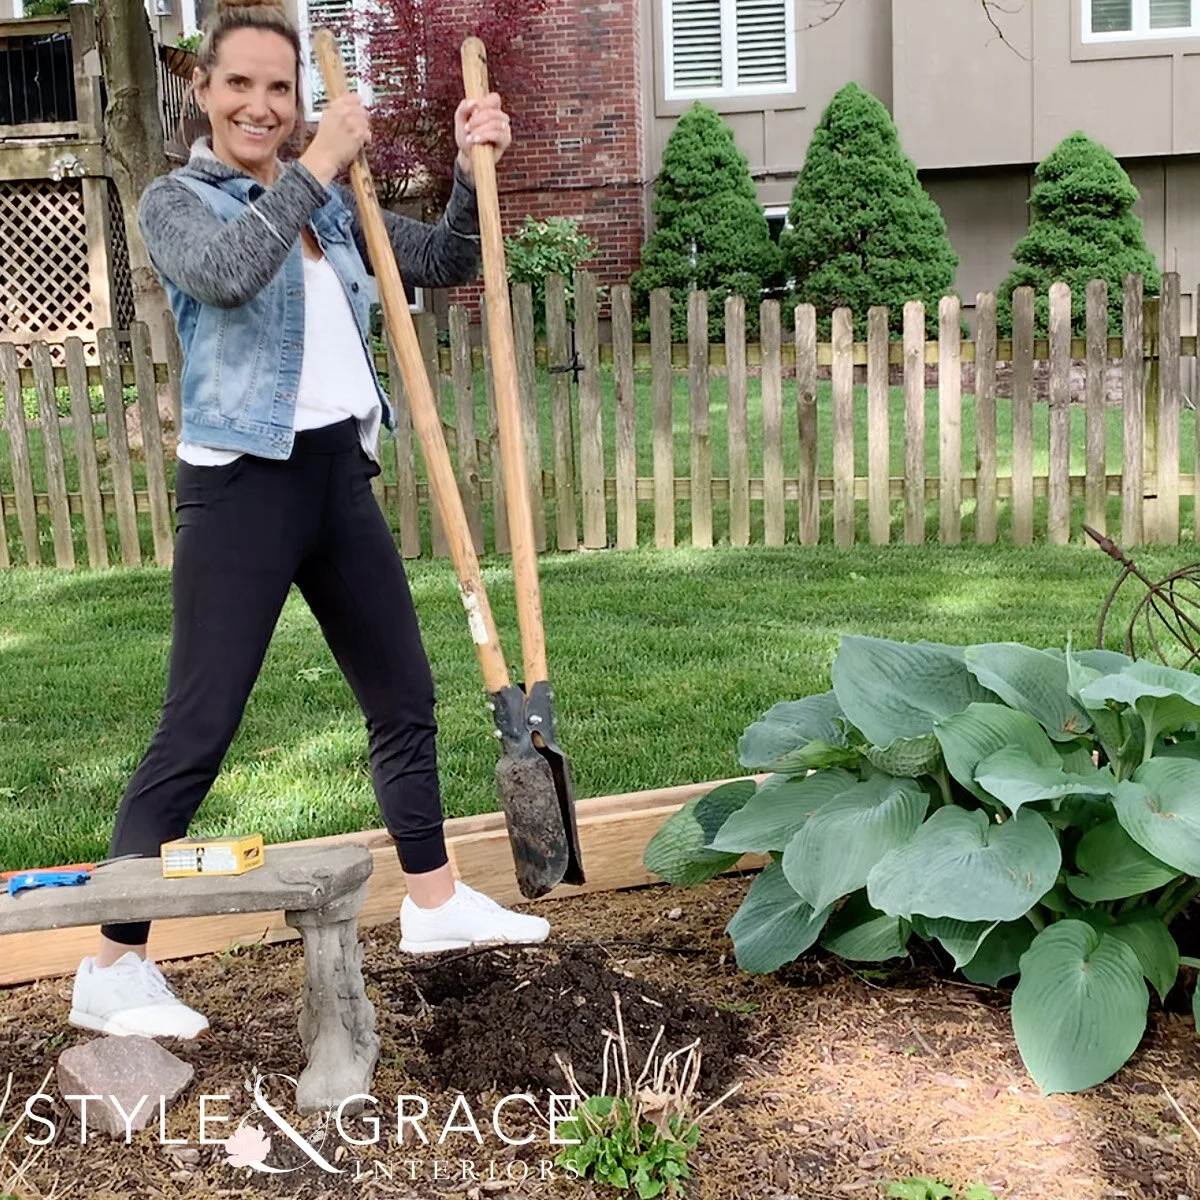
If you saw the picture of me at the top of this post with the post-hole digger and though to yourself, did Erica really dig out these post-holes herself??? No. The answer is no. Kerry was more than happy to help me with that part, haha. When digging the post holes, he made sure to measure the width between them so it would match up with the length of the boards we purchased for the slats. This step saves a lot of time an energy, because there were NO CUTS in this project! After digging out the post-holes, we dropped the 4 in. x 6 in. x 12 ft. posts into them, and we had the 2 in. x 6 in. x 8 ft. posts ready to serve as horizontal supports for the vertical posts.


There were a lot of hands involved in this next step, so if you have someone that can help you, it will be a lot easier. We held the vertical posts upright and made sure they were level. Next, we took the horizontal supports (one at a time), made sure they were level, and then screwed them into the vertical posts. With the structure standing on its own, we filled the post holes with the Quikrete — we used an entire bag for each post. Following the directions on the bag, we soaked the Quikrete with the hose and waited for the concrete to set!
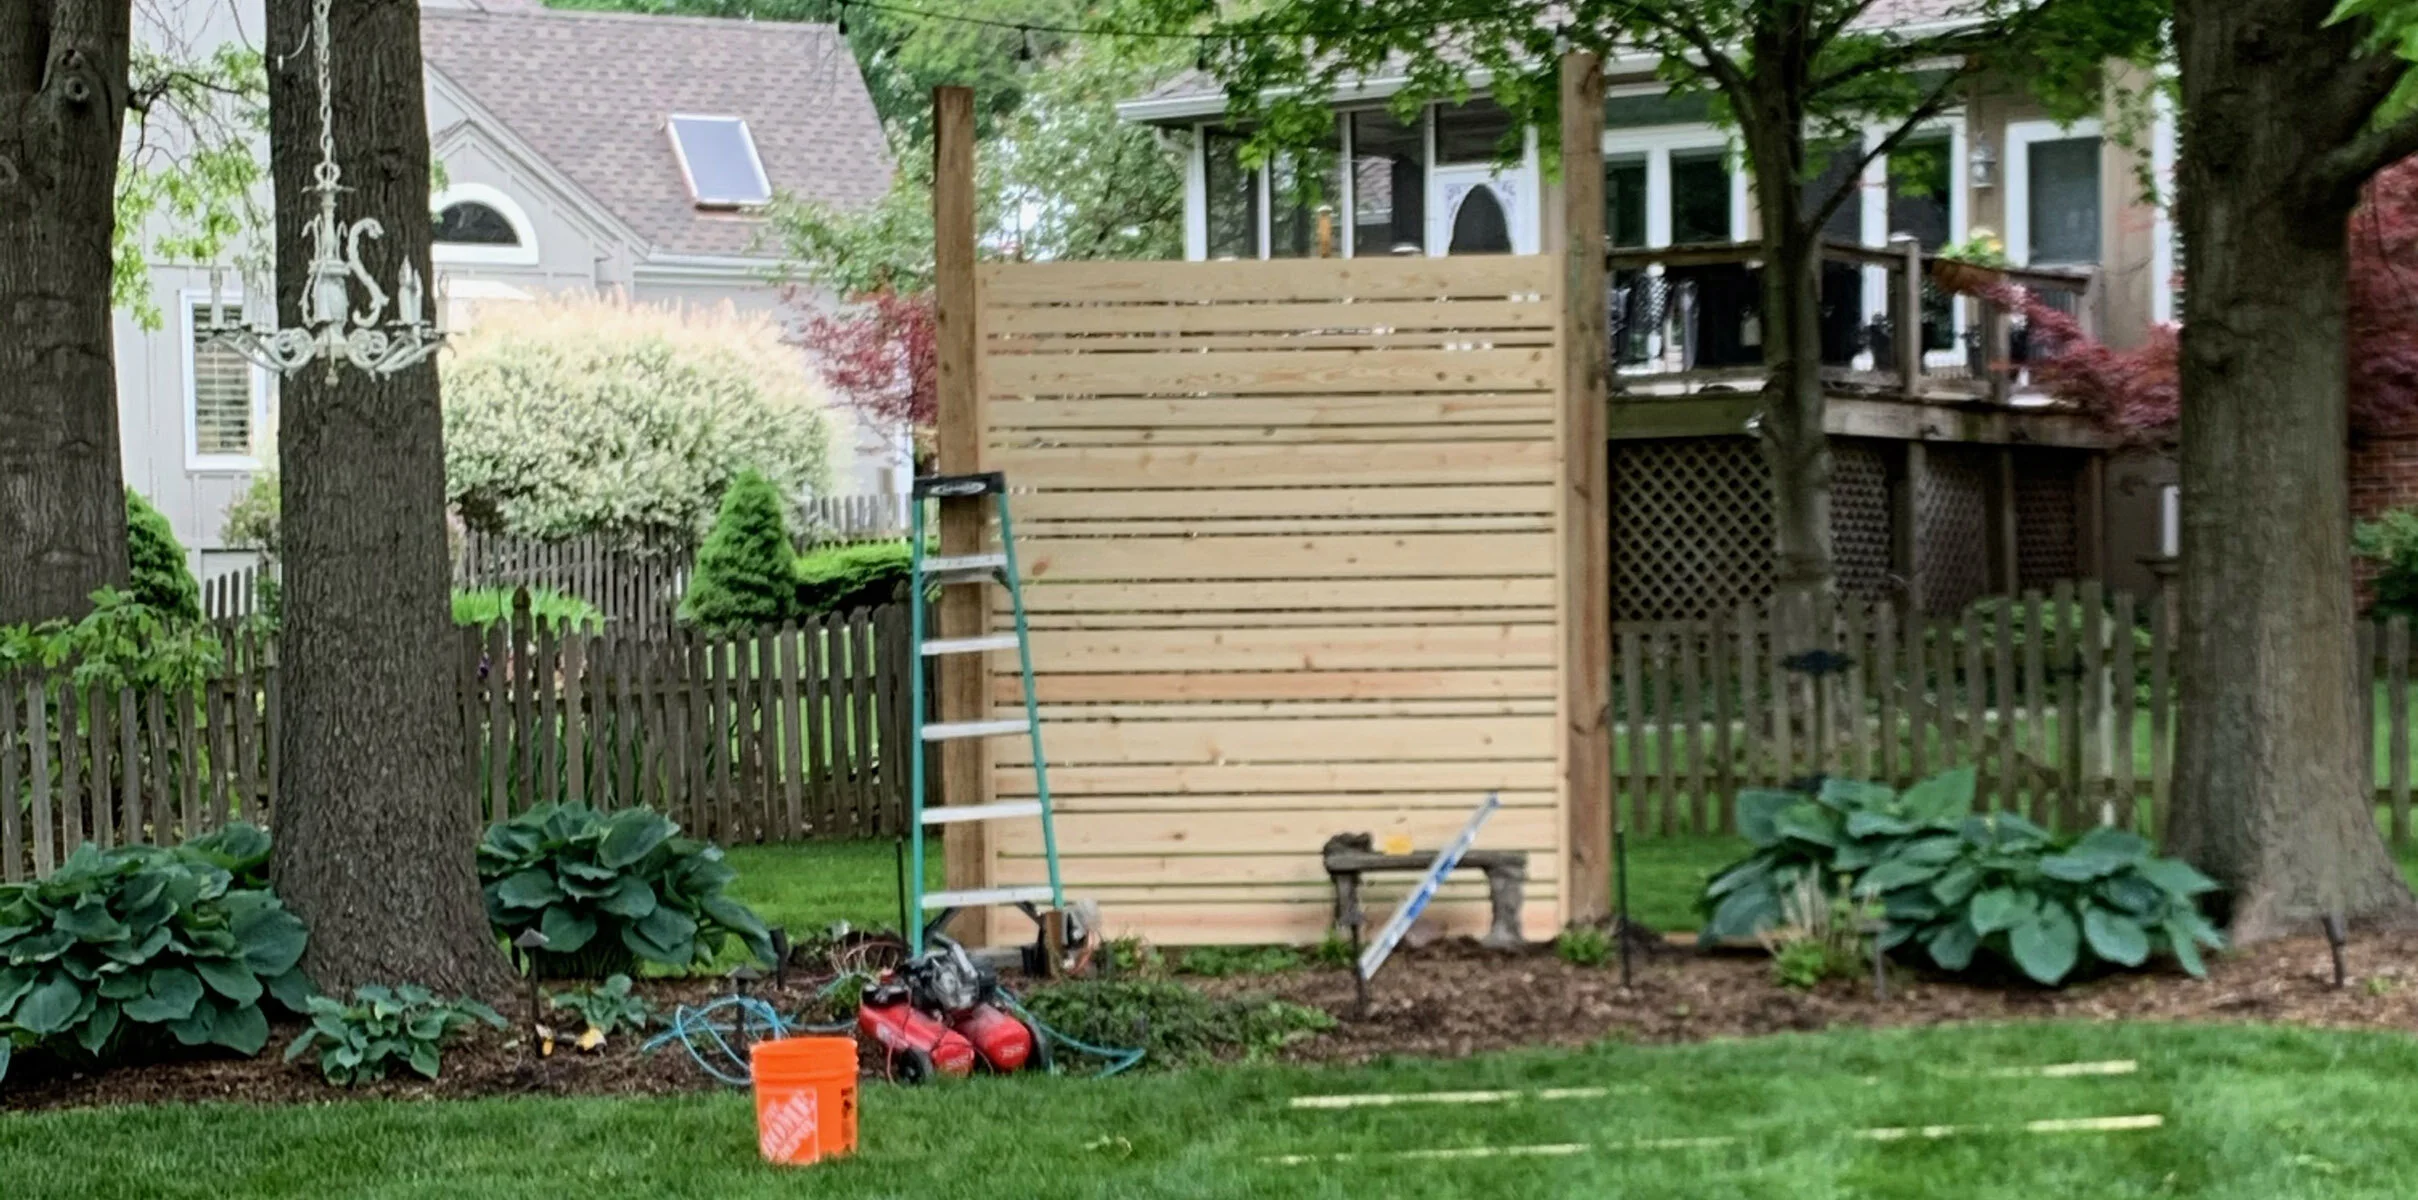
STEP 3: Attach Slats
After the concrete was set, we removed the horizontal supports in preparation for installing the slats. This next part is pretty straight forward, but was also the most exciting part to watch. Taking extra care to make sure each slat was level, we attached them to the vertical posts using a nail gun at first, and then securing them with a screw. We went with the alternating widths that Kerry came up with at Home Depot. It was so exciting to see the vision come to life! You’ll see in the finished product that we used some of the extra slats to add trim detail around the inside and across the top.


STEP 4: Add Boho Details & Decor (and eventually climbing plants)
Originally, this wall was conceptualized as a climbing plant wall, and it will still become one! I’ve been researching what plants to buy and even some of the really cool planters that hook into a slat wall like this. In the mean time, it was the PERFECT photo backdrop for my daughter’s graduation party. To add some boho chic style to the wall, we framed it out with eight foot birch logs. I went to a local retailer (shout out The Painted Sofa!) and picked out some dreamy decor pieces to build the final look. The Painted Sofa doesn’t have an online shop, but if you want to recreate this look, you can shop VERY similar products in the carousel below. Even if you don’t build the climbing plant wall, you can still use these accessories to create your own natural boho backdrop!
